
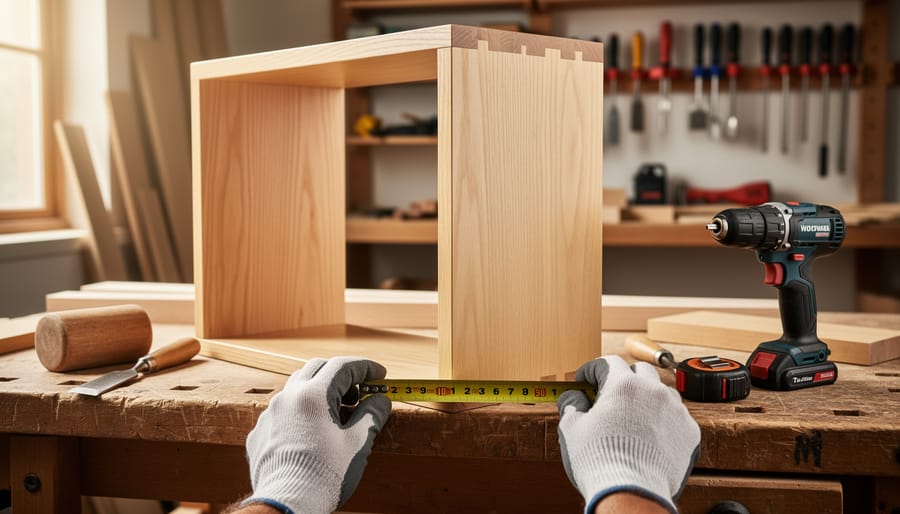
J & J Woodworking is your welcoming gateway to hands-on furniture making, designed specifically for beginners who want to start woodworking with confidence and community support. Whether you’re looking to build your first bookshelf or simply understand which tools won’t gather dust in your garage, this approach strips away the intimidation and gets you working with real wood in your first session.
What sets J & J Woodworking apart is its commitment to making traditional craftsmanship accessible without sacrificing quality or safety. You won’t find vague instructions or assumptions that you already own a fully stocked workshop. Instead, you’ll discover clear guidance on the essential tools that matter, step-by-step projects scaled for actual beginners, and a supportive community ready to celebrate your progress and troubleshoot your questions.
Many aspiring woodworkers stall before they even start, overwhelmed by expensive tool lists or convinced they need years of experience to create something worthwhile. The truth is simpler. With a modest collection of hand and power tools, proper safety knowledge, and a well-structured first project, you can complete a functional piece of furniture in a weekend. That first success builds the foundation for everything that follows.
This guide walks you through everything you need for your inaugural woodworking project: the specific tools and materials to gather, the non-negotiable safety practices that protect you from day one, a complete step-by-step process for building a beginner-friendly piece, and methods to verify your work meets quality standards. You’re not just learning to cut wood. You’re joining a tradition of makers who’ve discovered that creating something with your own hands delivers satisfaction no store-bought item ever could.
What You’ll Need: Essential Tools and Materials
Budget-Friendly Starter Kit
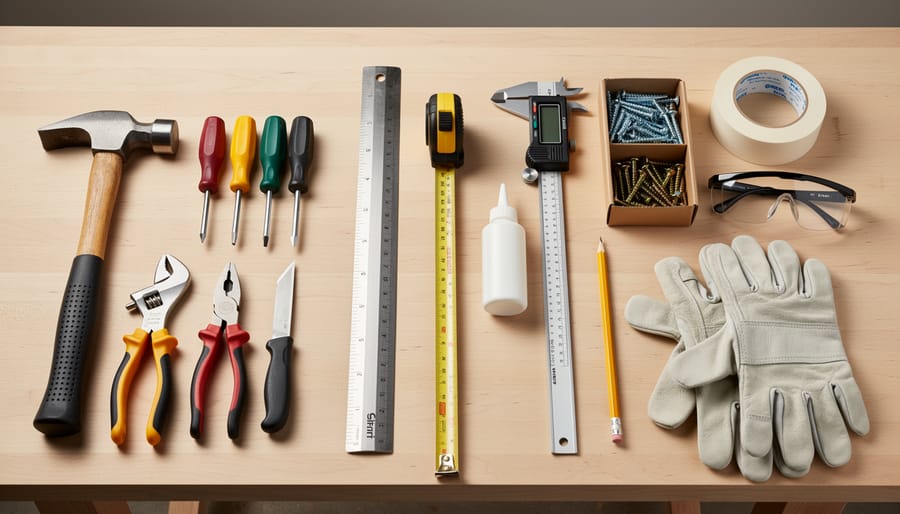
You don’t need to spend hundreds of dollars to get started. A smart beginner kit focuses on five essential tools that you’ll use in every project: a quality combination square for accurate marking and checking right angles ($25-40), a sharp handsaw for crosscuts ($30-50), a block plane for smoothing edges ($40-60), a cordless drill with basic bits ($60-80), and a set of chisels in three sizes ($40-70). These five tools, totaling around $200-300, will carry you through your first several furniture pieces with J & J Woodworking.
Invest your budget where it counts. A reliable combination square prevents compounding errors throughout a project, saving you time and materials. Similarly, a sharp handsaw and properly tuned block plane make the work enjoyable rather than frustrating. You’ll learn essential woodworking basics faster when your tools perform well.
Skip the enormous tool sets marketed to beginners. They often include low-quality items you won’t use. Instead, buy individual tools as projects demand them. A single good chisel beats a dozen dull ones, and you can add specialty sizes later. Many J & J Woodworking students start with exactly this core kit, then gradually expand their workshop as their skills and project ambitions grow.
Safety First: Essential Precautions for Your Workshop

Before you cut your first board or sand your first edge, you need to build safety habits that will protect you for decades of woodworking. The tools that let us shape beautiful furniture can also cause serious injury in a split second, but a well-organized workshop with the right protective gear and consistent practices makes crafting both safe and sustainable.
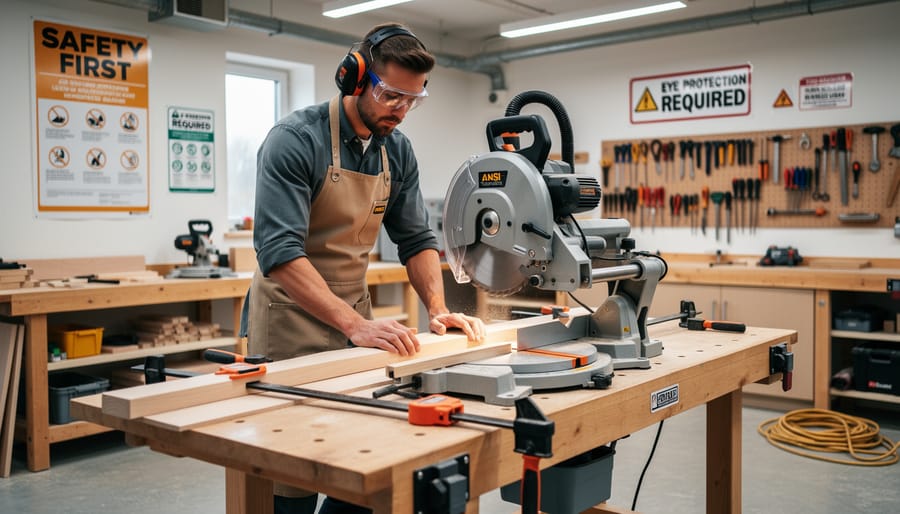
Start with personal protective equipment that addresses the two biggest long-term hazards in any workshop. Safety glasses or goggles are non-negotiable for every task, from hand planing to routing, because wood chips and splinters fly unpredictably. Equally important, wood dust can cause cancer and respiratory disease with prolonged exposure, so you should use PPE for wood dust such as a properly fitted N95 or higher-rated respirator whenever sanding or cutting produces fine particles. A basic dust mask is better than nothing, but if you plan to make woodworking a regular practice, invest in reusable respirator cartridges and pair them with a shop vacuum or dust collector attached to your power tools.
Your workspace setup matters as much as what you wear. Keep your floor clear of offcuts and cords, ensure adequate lighting so you can see cut lines and blade positions clearly, and establish a dedicated area for each tool with enough clearance to handle long boards safely. Store sharp tools in a way that protects both the edges and your hands, and always unplug power tools before changing blades or bits.
Tool-specific precautions become second nature with practice, but they require conscious attention at first. Never remove blade guards or safety features to make a cut easier, keep your hands well away from spinning blades using push sticks and featherboards, and let the tool do the work rather than forcing material through. If a cut feels awkward or unstable, stop and rethink your setup.
Finally, prepare for emergencies before they happen. Keep a well-stocked first aid kit within arm’s reach, know where your fire extinguisher is, and have a phone nearby to call for help if needed. The J & J Woodworking community consistently emphasizes that safe crafters are confident crafters, because you can focus on the joy of building when you trust your workspace and your habits.
Step-by-Step: Building Your First J & J Woodworking Project
Reading Plans and Making Adjustments
Woodworking plans can feel intimidating at first glance, but they’re simply a visual roadmap showing you what to build and how the pieces fit together. Start by identifying the cut list, this tells you exactly which boards you need and their dimensions. Pay close attention to the difference between rough dimensions (what you buy) and finished dimensions (after planing and sanding). If a plan calls for 3/4″ thick stock, that’s the final measurement after smoothing.
Don’t treat plans as inflexible blueprints. If a design specifies expensive hardwood but you’re working with pine, adjust your joinery expectations, softer woods may need reinforcement or different fasteners. When a project calls for an advanced epoxy resin finish but you’re just starting out, substituting a simpler oil or wax finish keeps the project within your skill range without compromising the learning experience.
Always measure your actual materials before cutting. Dimensional lumber often varies slightly from stated sizes, and those small differences compound quickly. Mark your measurements twice, and remember that you can always remove more wood but you can’t add it back.
Common Mistakes and How to Avoid Them
Every beginner woodworker makes mistakes, it’s how you learn what works and what doesn’t. The difference between frustration and growth lies in recognizing these common pitfalls early and knowing how to recover.
Measuring once and cutting immediately causes more ruined boards than any other error. Always measure twice, mark clearly with a sharp pencil, and double-check your math before making that cut. Keep a scrap piece nearby to test your setup first, especially when using power tools for the first time on a new project.
Rushing through cuts leads to splintered edges, angled mistakes, and wasted material. Slow down. Let the saw do the work rather than forcing it through the wood. If you’re tired or distracted, step away, the project will be there tomorrow, but you can’t uncut a board.
Skipping the dry-fit before gluing is asking for trouble. Always assemble your joints without adhesive first to verify everything fits properly. This gives you a chance to make adjustments when they’re still easy, not after glue is setting and panic is rising.
Improper joinery often comes from assuming joints will hold themselves together. Apply even clamping pressure, use enough glue (but not too much), and give adequate drying time. A joint that fails during assembly can be fixed; one that fails after you’ve moved on creates compound problems.
Remember: master woodworkers still make mistakes. The difference is they’ve learned to catch them early, fix them creatively, and move forward without losing confidence.
Checking Your Work: Verification and Quality Control
Stepping back to evaluate your work is just as important as the building process itself. Once your project is assembled and finished, give yourself a day or two before conducting a thorough inspection, fresh eyes catch what tired ones miss.
Start with structural integrity. Gently apply pressure to joints and test any moving parts like drawers or doors. A well-made piece shouldn’t wobble, creak excessively, or feel fragile. Place your hands on opposite corners and apply light diagonal pressure; if the frame racks or shifts, you may need to reinforce joints or add corner bracing. For chairs or benches, sit on them carefully and shift your weight. These practical tests reveal whether your joinery and construction are sound.
Next, run your hands over all surfaces. Your fingers will detect imperfections your eyes might overlook, rough patches, glue squeeze-out you missed, or areas where the finish feels uneven. Look at the piece from different angles under good lighting to spot drips, streaks, or thin coverage in your finish. Check that doors hang straight, drawers slide smoothly, and any hardware functions properly without binding.
Here’s the honest truth about perfection: commercial furniture has flaws too, you just don’t notice them. If your project is sturdy, functional, and the visible surfaces look good from three feet away, you’ve succeeded. Small gaps you can see up close, slight color variations, or tool marks on hidden surfaces don’t diminish the accomplishment. The goal is furniture you’re proud to use and show others, not museum-quality perfection on your first attempt. That critical eye you’re developing will naturally improve with each project, so trust the process and celebrate what you’ve built.
Next Steps: Growing Your Skills and Joining the Community
Finishing your first project marks the beginning, not the end, of your woodworking story. J & J Woodworking encourages you to build on this foundation by tackling projects that introduce one or two new skills at a time, perhaps a piece with dovetail joints, or a small cabinet with doors. This incremental approach prevents overwhelm while steadily expanding your capabilities.
The J & J community becomes invaluable as you progress. Sharing photos of your work in their forums or local meetups invites constructive feedback from both instructors and fellow students who’ve walked the same path. You’ll discover that other woodworkers genuinely want to help you succeed, offering solutions to challenges you’re facing and celebrating your improvements. Many lifelong friendships start over discussions about grain direction and finish choices.
Consider joining J & J’s intermediate workshops or project-specific courses that focus on advanced techniques like veneering, curved work, or traditional joinery. These structured learning opportunities give you expert guidance when self-teaching becomes difficult. You’ll also meet collaborators for larger projects that require multiple skill sets or extra hands.
Sarah Chen, who joined J & J as a complete novice in 2024, now teaches basic joinery classes herself. “I never imagined I’d move from struggling with straight cuts to helping others,” she says. “The community believed in me before I believed in myself.” Stories like Sarah’s aren’t rare, they’re the norm when you commit to consistent practice and stay connected.
Set a realistic schedule for your next project. Even two hours weekly keeps skills fresh and momentum building. Document your progress through photos or a simple journal, noting what worked and what didn’t. This record becomes a personal reference guide and a tangible reminder of how far you’ve come since that uncertain first cut.
Starting your woodworking journey with J & J Woodworking means joining a community that genuinely celebrates every first cut, every completed joint, and every finished piece. You don’t need a fancy workshop or decades of experience, just curiosity and the willingness to try.
The furniture you build with your own hands carries something no store-bought piece ever will: your effort, your problem-solving, and your growing skill. That simple bench or side table represents more than assembled wood; it’s proof that you can create lasting, functional beauty.
Remember, every accomplished woodworker started exactly where you are now, unsure about measurements, nervous about their first saw cut, wondering if they could really do this. They took the first step anyway. Our beginner guide and supportive community are here to walk alongside you through each stage of learning.
Your first project won’t be perfect, and that’s entirely fine. What matters is that you start. Pick up that pencil, mark your wood, and make the first cut. The J & J Woodworking community is waiting to cheer you on.
Frequently Asked Questions
Starting a new craft naturally brings questions, and J & J Woodworking’s community has heard them all. Here are straightforward answers to what beginners most frequently ask before taking their first steps into furniture making.
Do I need a full workshop to start?
No. Many beginners work successfully in a garage corner, basement area, or even a dedicated room with good ventilation. You need enough space to safely handle lumber and move around your workpiece, typically around 10×10 feet for starter projects.
How much does basic equipment cost?
A functional starter kit runs between $300 and $600 depending on whether you buy new or find quality used tools. This covers essential hand tools, basic power tools, and initial materials for your first project without cutting corners on safety or quality.
How long does it take to complete a first project?
Most beginners finish a simple bench or side table in 15 to 25 hours spread across several weekends. Your pace matters less than working carefully and learning each technique properly, so don’t rush the process.
Are J & J Woodworking courses suitable for absolute beginners?
Yes, completely. The teaching approach assumes no prior experience and builds skills progressively, starting with fundamental techniques before advancing to more complex joinery and finishing methods.
What about mistakes? They’re inevitable and valuable. Every experienced woodworker has stories about pieces that didn’t turn out as planned, cuts that went astray, or joints that needed redoing. J & J Woodworking emphasizes that errors teach more than perfect execution ever could. You’ll learn to assess what went wrong, adjust your technique, and move forward with better understanding. The community forums are filled with supportive members who’ve faced the same challenges and are happy to help troubleshoot.
Can you really learn woodworking online? While hands-on practice is irreplaceable, quality online instruction paired with actual building in your workspace creates an effective learning path. J & J Woodworking’s courses combine video demonstrations, detailed plans, and community support that lets you pause, replay, and ask questions as you work through each step. Many students find this approach less intimidating than in-person classes where they might feel rushed or self-conscious about their beginner status.
What if you don’t have anyone to help or teach you locally? That’s precisely why J & J Woodworking built such an active online community. Members share photos of their work-in-progress, ask for advice on specific challenges, and celebrate completed projects together. You’re never truly working alone when you can post a question and get multiple perspectives from people at various skill levels who remember exactly what confused them when they started.