
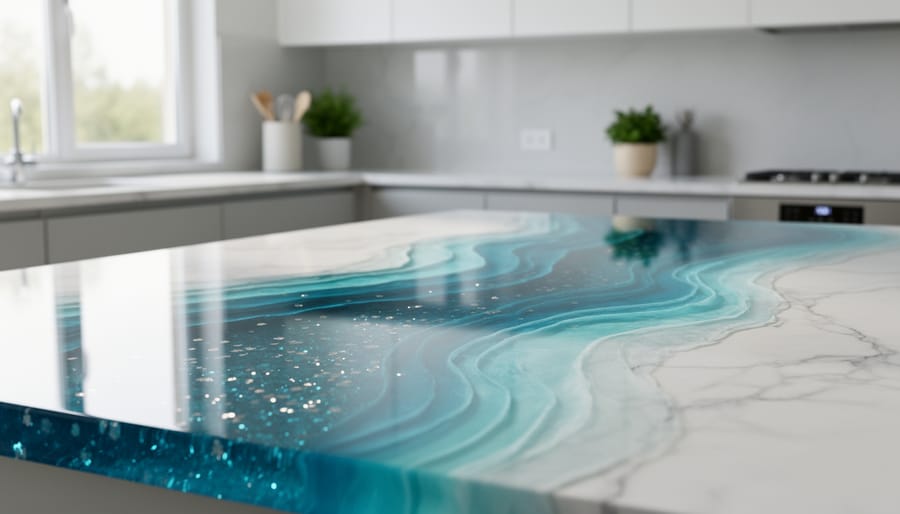
Epoxy resin countertops transform ordinary surfaces into stunning focal points through a combination of pigments, metallics, and creative pouring techniques. Whether you’re drawn to ocean-inspired swirls, marble-like veining, or shimmering geode effects, these 12 ideas range from straightforward single-color pours perfect for first-timers to intricate multi-layer designs that challenge more experienced crafters.
The beauty of epoxy resin work lies in its accessibility. You don’t need a professional workshop or years of experience to create something remarkable. Many crafters in our community started with a basic kit and a secondhand countertop section, experimenting in their garage before tackling their kitchen island. The material itself is forgiving enough for beginners yet versatile enough to keep advanced makers engaged.
What makes this medium particularly exciting right now is the explosion of affordable pigment options and improved resin formulas designed specifically for horizontal surfaces. The curing process has become more predictable, and the risk of common mistakes like bubbling or uneven settling has dropped considerably with better products and shared community knowledge.
This collection showcases designs you can actually achieve, not just admire. Each idea includes visual reference points and practical considerations about technique difficulty, so you can match projects to your current skill level while planning your next creative challenge.
Why Epoxy Resin Countertops Are Taking the Crafting World by Storm
Epoxy resin countertops have captured the imagination of DIY enthusiasts because they deliver professional-looking results without the professional price tag. Understanding what epoxy resin is opens up a world where you’re limited only by your creativity, not your budget or the constraints of traditional materials like granite or quartz.
The cost savings alone make resin countertops attractive. Where stone countertops can run thousands of dollars installed, epoxy resin projects often cost a fraction of that, especially when you’re doing the work yourself. You’re paying for materials and your time, not markup and installation fees.
But the real magic lies in customization. Want an ocean scene in your bathroom? A galaxy swirl in your craft room? Embedded seashells from your favorite beach vacation? Epoxy resin lets you create surfaces that reflect your personality in ways traditional materials never could. Each countertop becomes a one-of-a-kind art piece.
The craft has become remarkably accessible too. Workshops and online courses have demystified the process, breaking it down into manageable steps that beginners can tackle confidently. Instructors share techniques that once seemed like trade secrets, and supportive crafting communities provide encouragement when challenges arise. You don’t need years of experience to start creating beautiful countertops that transform your space.
How We Chose These Epoxy Resin Countertop Ideas
We curated these twelve designs by evaluating what makes an epoxy resin countertop project both inspiring and achievable for crafters at different stages of their journey.
Visual impact topped our list. Each idea needed to showcase the transformative power of epoxy resin and demonstrate why this medium captivates so many creative individuals. We prioritized designs that photograph beautifully and translate well in real-world spaces.
Skill-level accessibility mattered equally. Our selection spans beginner-friendly options like solid color applications through to advanced techniques requiring practiced hands. This range ensures everyone finds an entry point that matches their current abilities while offering room to grow.
Material availability shaped our choices too. We featured designs using pigments, powders, and materials readily sourced online or through local craft suppliers, avoiding exclusive or prohibitively expensive components.
Finally, we consulted experienced resin instructors and reviewed hundreds of student projects from workshops nationwide. The ideas that consistently produced successful results and generated excitement in the crafting community earned their spots. These aren’t theoretical concepts, they’re proven designs that real crafters have executed beautifully, often as their very first resin projects.
1. Ocean Wave Effect: Bring Coastal Beauty Indoors
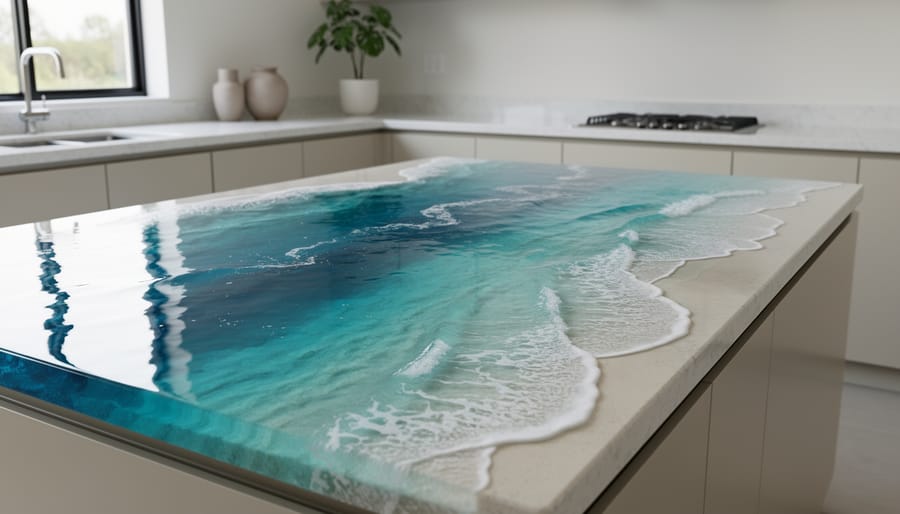
The ocean wave effect captures the movement and depth of coastal waters right on your countertop surface. You’ll start with a deep navy or cobalt blue base layer, then introduce lighter turquoise and teal swirls while the resin is still workable. The magic happens when you add white pigment in strategic spots to mimic seafoam and wave crests.
This technique relies on careful layering and timing. Pour your darkest blues first, then drizzle lighter shades in natural, irregular patterns rather than perfect lines. A heat gun gently blown across the surface helps colors blend and creates organic movement. For the foam effect, splatter small amounts of white resin along what will be your wave tops, then use a toothpick or spreader to pull and feather the edges.
The ocean wave design works beautifully in bathrooms where moisture resistance matters, and it brings calming energy to kitchen prep areas. Many crafters choose this as their first artistic countertop because the ocean naturally lacks symmetry, imperfections look intentional rather than accidental. The forgiving nature makes it perfect for building confidence while creating something genuinely stunning.
2. Marble Veining Look: Luxury on a Budget
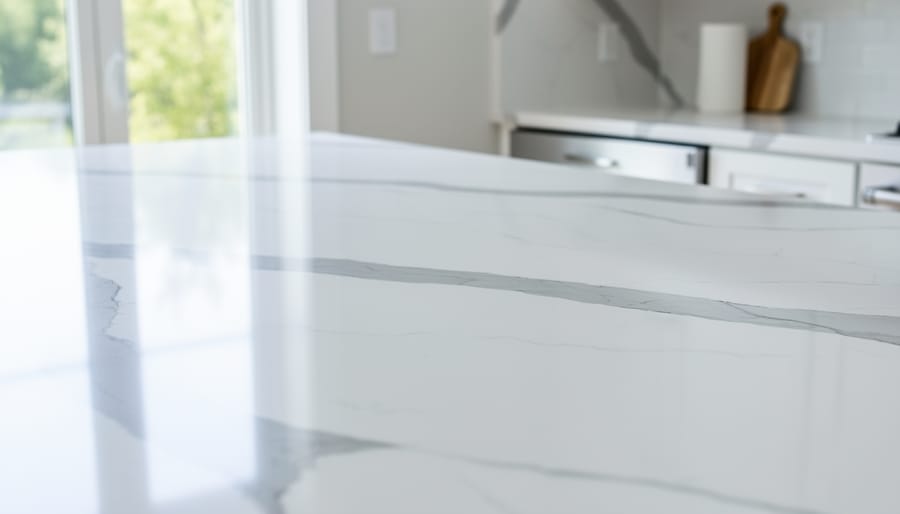
White and grey marble veining offers the sophisticated look of Carrara or Calacatta marble without the hefty price tag. This design ranks among the most forgiving for newcomers because natural marble itself shows irregular patterns, slight imperfections actually enhance realism rather than detract from it.
The feathering technique creates those delicate, wandering veins characteristic of genuine stone. Start with a white base coat, then introduce thin streams of grey epoxy mixed with metallic powder. Using a toothpick, heat gun on low setting, or even a drinking straw, gently pull and stretch the grey through the white in diagonal sweeps. The key is restraint; real marble shows sporadic veining, not dense coverage.
For deeper dimension, layer your veins at different stages of cure. Apply the boldest veins first, let them partially set, then add finer lines that intersect or run parallel. A touch of silver or gold metallic pigment along some veins catches light beautifully and mimics the mineral deposits found in natural stone.
Many beginners appreciate how this technique borrows principles from wood prep techniques patience during preparation yields professional results. The marble look works brilliantly in kitchens, bathrooms, and vanity areas where classic elegance matters.
3. Metallic Gold and Black Geode Style
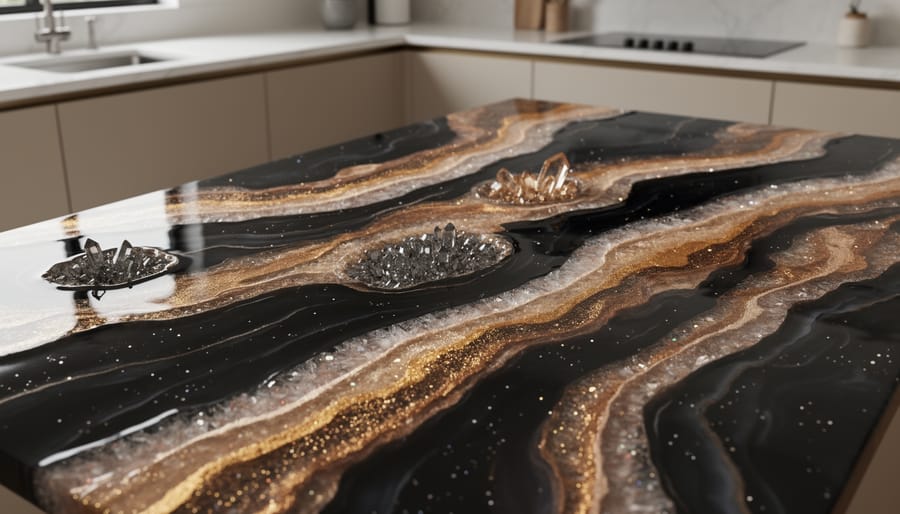
A black epoxy base swirled with shimmering gold metallic pigments transforms an ordinary counter into a dramatic geode slice that stops guests mid-conversation. This design captures the raw beauty of split agate or quartz crystals, with gleaming metallic veins cutting through darkness and crystallized edges that catch light from every angle.
The magic happens when you apply metallic powders while the black resin remains slightly tacky. Dust or brush gold, bronze, or copper pigments along planned veins, then use a heat gun to activate the metallics and create organic flowing patterns. Crushed tempered glass or clear resin chunks pressed into the edges before final curing mimic the crystalline druzy formations found in natural geodes.
This technique demands patience, layering colors at specific intervals, but rewards you with a genuine statement piece. Feature bars, entryway consoles, and powder room vanities become gallery-worthy installations. Students in advanced resin workshops often choose geode designs as their signature project, learning how metallic manipulation creates depth that photographs beautifully and draws the eye across the entire surface.
4. Wood and Resin River Design
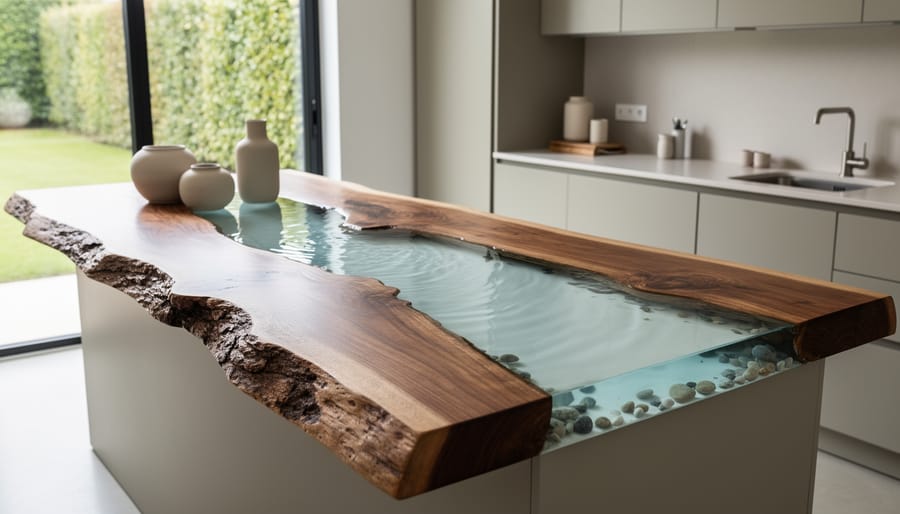
Wood and resin river countertops marry two beloved crafts into stunning statement pieces that feel both rustic and contemporary. The design centers on live-edge wood slabs positioned to create a gap down the middle, which you then fill with colored epoxy to mimic a flowing river cutting through natural terrain.
Selecting the right wood matters enormously. Look for slabs with interesting grain patterns and natural edges, walnut, maple, and oak all work beautifully. The wood must be completely dry (below 12% moisture content) to prevent warping and cracking after you pour the resin. Cut your slabs to size and arrange them on your countertop base, playing with the spacing until the river shape feels organic rather than forced. Gentle curves following the wood’s natural contours create the most convincing water-like flow.
Preparation takes patience but pays off. Sand the wood smooth, then secure the slabs in position with temporary bracing. Build a dam around the perimeter using melamine board or silicone caulk to contain the resin pour. For the river itself, blues and greens with white swirls create classic water effects, though some crafters choose bold metallics or clear resin to showcase objects beneath. Pour in layers if your river exceeds one inch deep, allowing each layer to partially cure before adding the next. This technique has become a favorite in woodworking and resin workshops, where students love combining their newly developed skills into one cohesive project.
5. Galaxy and Cosmic Swirl Effect
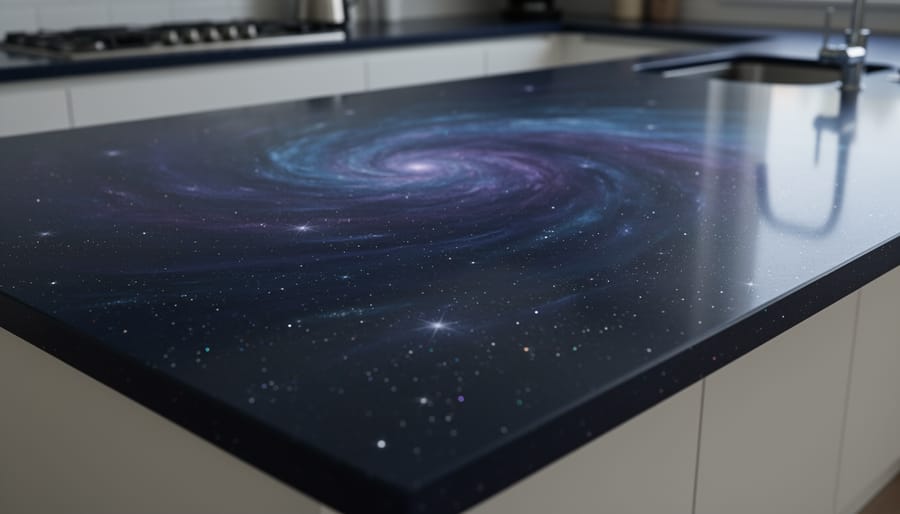
Imagine a countertop that captures the mystery of deep space right in your kitchen or bathroom. The galaxy and cosmic swirl effect combines deep purples, midnight blues, and rich blacks to create a mesmerizing universe on your surface. This design has become a favorite among artistic crafters because it rewards experimentation and creative expression.
The technique starts with a black base, then layers transparent purples and blues in swirling motions to create depth. Here’s where the magic happens: metallic mica powders in silver, gold, and copper get strategically placed to mimic distant stars and nebulae. Some crafters add fine holographic glitter for twinkling starlight effects that catch the light from different angles.
The beauty of this design lies in its forgiving nature. There’s no wrong way to arrange a galaxy. Each swirl and shimmer creates something unique. Students in resin workshops often choose this project because it lets them play with transparency and opacity, learning color theory while creating something truly cosmic. A heat gun helps blend the colors and create those signature nebula clouds, while careful application of metallic powders prevents them from sinking before the resin sets.
6. Clear Resin with Embedded Objects
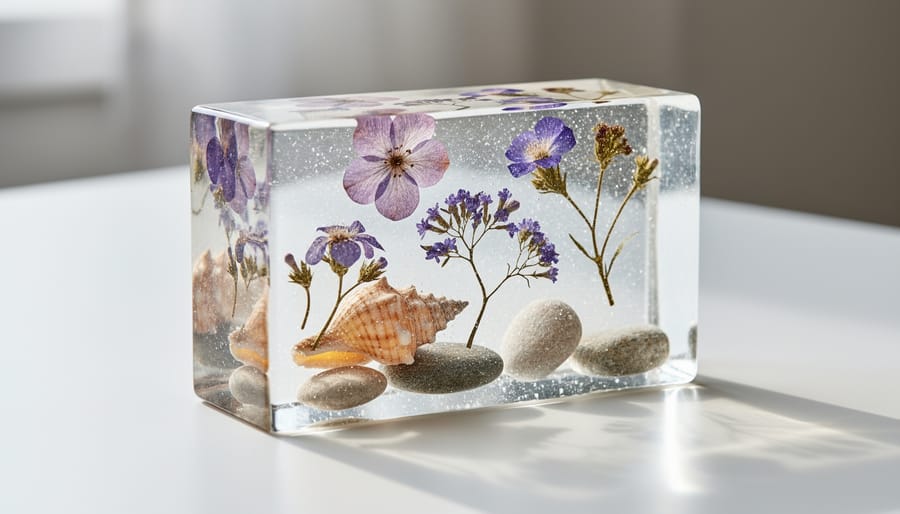
Transparent epoxy resin transforms everyday countertops into three-dimensional memory keepers. This design suspends meaningful objects, seashells from beach vacations, vintage coins, pressed flowers, family photos, ticket stubs, or children’s artwork, within crystal-clear layers, creating conversation pieces that tell your story.
The technique requires careful planning. Arrange objects on your prepared surface before pouring, considering how they’ll appear from different angles. Heavier items need a base layer to prevent sinking, while lightweight pieces may require strategic placement in subsequent pours. Most crafters use multiple thin layers rather than one thick pour, allowing precise control over object positioning and reducing bubble formation.
Achieving glass-like clarity takes patience. Use high-quality epoxy specifically formulated for clarity, mix slowly to minimize air bubbles, and apply a torch or heat gun immediately after pouring to release trapped air. Seal porous objects like photos or flowers with clear spray beforehand to prevent resin absorption that creates dark spots.
Workshop instructors emphasize starting with non-porous items like shells or coins for your first project. These forgiving materials help you master the layering process before tackling delicate photographs or organic materials.
7. Solid Color with Glitter Infusion
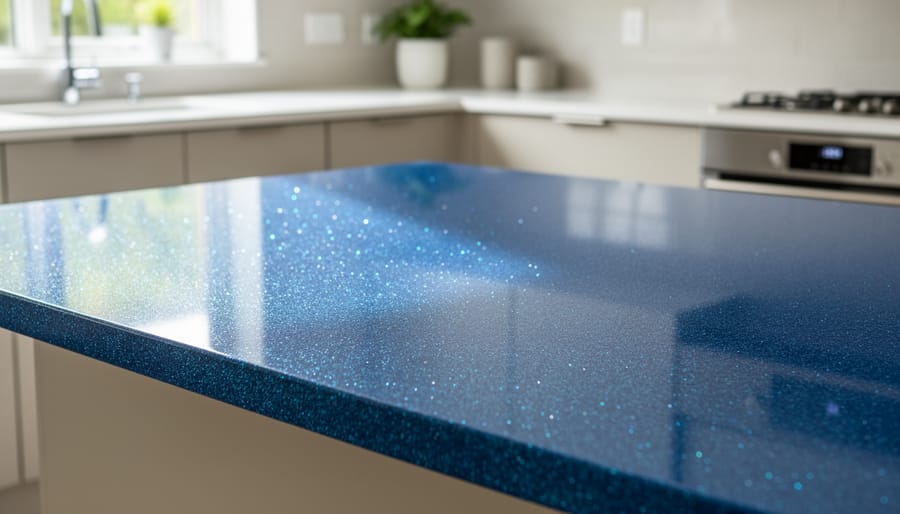
A single bold color mixed with glitter creates one of the most beginner-friendly yet visually stunning epoxy countertop designs. Choose a saturated jewel tone, emerald green, ruby red, sapphire blue, and enhance it with fine or chunky glitter for instant glamour.
The beauty of this technique lies in its simplicity. You’re working with one base color, which eliminates the timing challenges of blending multiple hues. Mix your chosen pigment thoroughly into the resin, then fold in your glitter just before pouring. Fine glitter creates subtle sparkle throughout, while chunky pieces add bold, eye-catching dimension.
This design shines in powder rooms, craft studios, and vanity areas where a touch of personality makes the space memorable. The glitter catches light from different angles, creating depth and movement that solid color alone can’t achieve. Students in beginner workshops often choose this approach for their first project because the results look professional with minimal technique required, building confidence for more complex designs later.
8. Terrazzo-Inspired Chip Design
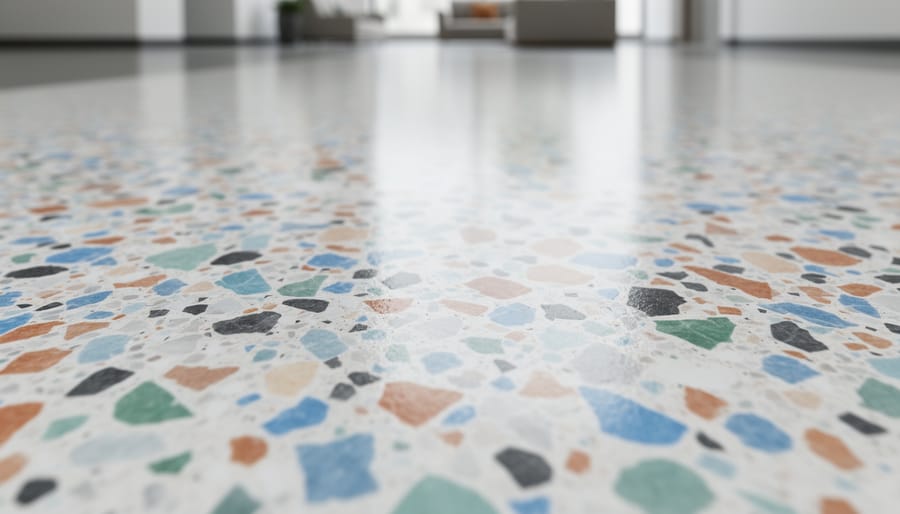
Terrazzo-style epoxy countertops combine sustainability with stunning visual interest. You create this look by suspending colorful resin chips, crushed glass, or even repurposed materials like old acrylic pieces throughout a clear or lightly tinted epoxy base.
The key to authentic terrazzo appearance lies in chip variety. Mix different sizes, from fine confetti to chunky fragments about half an inch across. This size variation prevents the design from looking too uniform or artificial. For color balance, choose three to five complementary shades rather than dumping in every color available. Many crafters successfully use leftover resin from previous projects, making this an eco-friendly way to reduce waste.
Scatter chips randomly across your prepared surface before pouring the clear topcoat, or mix them directly into slightly thickened epoxy for more control over distribution. The beauty emerges after sanding and polishing, when the chips become level with the surrounding resin, revealing their full spectrum of colors.
This technique works beautifully for kitchen islands and bathroom vanities, offering a playful yet sophisticated aesthetic that celebrates both creativity and environmental consciousness.
9. Ombre Color Fade Technique
The ombre fade technique delivers sophisticated, gallery-worthy results that belie its beginner-friendly nature. This approach creates a seamless gradient, perhaps soft peach melting into deep coral, or sage green transitioning to forest tones, by pouring progressively darker or lighter resin batches across your countertop surface. The key lies in timing: you’ll work while the resin remains fluid, using a heat gun or torch to gently blend the edges where colors meet, creating those signature soft transitions rather than hard lines. Many crafters discover this technique through beginner workshops where instructors demonstrate the “wet-on-wet” method, pouring the second color while the first is still workable. Contemporary kitchens especially embrace ombre countertops in neutral palettes (cream to taupe, grey to charcoal) that complement modern cabinetry without overwhelming the space, though bolder color stories work beautifully in powder rooms and home bars.
10. Glow-in-the-Dark Resin Countertops
Glow-in-the-dark countertops bring a touch of magic to functional spaces. By mixing photoluminescent pigments into your epoxy resin, you create surfaces that absorb light during the day and emit a soft, ethereal glow after dark. This effect works beautifully in powder rooms where nighttime visits become easier without harsh overhead lights, and in home bars or entertainment areas where the ambient glow sets a memorable mood.
The key is getting your pigment ratio right. Most crafters start with 5-10% photoluminescent powder by weight of the resin. Too little and the glow disappoints; too much can affect curing and clarity. The pigments need “charging” through exposure to natural or artificial light for several hours. Bright afternoon sun works best, but even standard room lighting builds up enough energy for a gentle glow lasting several hours.
You can combine glow pigments with other techniques. Try creating a river design that glows at night, or embed glow powder in specific patterns while keeping the rest clear. Some crafters who start woodworking incorporate glow resin into their wood-and-resin projects for stunning nighttime reveals. The effect never gets old, and guests always ask how you achieved it.
11. Fire and Lava Flow Effect
For crafters craving drama, the fire and lava flow effect turns countertops into molten art. This design combines deep blacks with fiery reds and bright oranges, accented by metallic copper or gold pigments that catch the light like glowing embers. The magic happens with a heat gun: as you wave it across the wet resin, heat creates cell structures and flowing patterns that mimic actual lava movement.
Understanding epoxy resin basics helps, but this technique requires practice to control the flow without overheating. You’ll pour your colors in strategic zones, then use heat to push and pull them together, creating organic, unpredictable patterns. The metallic accents settle into crevices, mimicking cooling lava cracks.
This bold choice works beautifully for bar tops, accent pieces, or workshop demonstration projects where visual impact matters. Students often report that mastering the heat gun control for this effect builds confidence for other advanced techniques.
12. Minimalist White with Subtle Shimmer
Not every epoxy countertop needs to shout for attention. A clean white or soft off-white base with pearl pigments or a whisper of metallic shimmer creates an elegantly understated surface that fits beautifully into Scandinavian, minimalist, or transitional kitchens. This approach proves that resin work isn’t reserved for bold ocean waves or fiery lava effects, it can deliver quiet sophistication too.
The technique is straightforward: mix white pigment into your resin, then add a small amount of pearl mica powder or subtle silver shimmer. The key is restraint. You want just enough shimmer to catch light at certain angles without looking glittery or busy. Many crafters in our community workshops choose this design for their first project because it’s forgiving and doesn’t require complex color blending or timing.
The result feels timeless rather than trendy. It pairs seamlessly with natural wood cabinetry, matte black fixtures, or pale stone backsplashes. For renters or those planning to sell, this subtle elegance appeals broadly while still showcasing your handcrafted skill.
Getting Started with Your Own Epoxy Resin Countertop Project
Seeing those twelve countertop ideas might feel overwhelming if you’re new to resin work, but here’s the truth: every skilled crafter featured in workshops started exactly where you are now. Sarah Martinez took her first resin course in 2024 after browsing inspiration photos for months, and within three months she’d completed a stunning ocean wave vanity for her guest bathroom. The key is starting small and building confidence through hands-on practice.
Your first step should be finding structured learning that fits your schedule. Many craft schools now offer weekend intensives specifically for resin countertops, where you’ll work on sample boards before tackling a full project. Online courses provide flexibility, letting you pause and rewatch techniques until they click. Look for programs that include community forums or live Q&A sessions, having an instructor answer your specific questions makes a massive difference. Local makerspaces sometimes host resin workshops too, giving you access to ventilation equipment and experienced mentors without upfront investment in a full studio setup.
Before your first pour, gather these essentials:
- Epoxy resin and hardener rated for countertop thickness (tabletop or casting resin, not craft resin)
- Pigments or mica powders in your chosen colors
- Mixing cups, stir sticks, and digital scale for precise measurements
- Heat gun or torch for removing bubbles
- Protective gear: nitrile gloves, respirator mask, safety glasses
- Leveling tools and plastic sheeting to protect your workspace
Specialty resin suppliers offer beginner kits that include quality materials with instructions, saving you from buying full-size containers of products you might not love. Craft stores stock basics, but experienced resin artists recommend investing in professional-grade epoxy from the start, cheaper products yellow faster and cure inconsistently.
Set realistic expectations for your timeline. A small accent piece might take a weekend (with curing time between layers), while a full kitchen counter could span two weeks of evening sessions. David Chen’s first project, a simple glitter-infused desk topper, taught him patience when he rushed the cure and had to sand and recoat. His second attempt, following the recommended timing, turned out flawless. That learning curve is normal and valuable.
Common Questions About Epoxy Resin Countertop Making
How much does it cost to make an epoxy resin countertop yourself?
Material costs typically range from $100 to $300 for a small countertop project, depending on the design complexity and pigments used. This is significantly cheaper than hiring a professional or purchasing traditional stone alternatives, making it an attractive option for budget-conscious crafters.
Are epoxy resin countertops actually durable for everyday use?
When properly cured and sealed, epoxy resin countertops are highly durable and resistant to heat, scratches, and moisture. They can last 10-20 years with proper care, though using trivets for hot pots and cutting boards remains good practice.
Do I need prior experience to create my first countertop?
No experience is necessary to get started. Many successful countertop makers began as complete beginners through structured courses and workshops that teach proper techniques from the ground up.
How long does it take to complete an epoxy resin countertop?
Most projects require 3-7 days from start to finish, accounting for surface preparation, resin pouring, curing time, and final finishing. The actual hands-on work is usually 8-12 hours spread across multiple days.
What are the biggest mistakes beginners make?
Rushing the cure time, not measuring resin and hardener accurately, and skipping proper surface preparation are the most common pitfalls. Working in a temperature-controlled environment and following mixing ratios precisely prevents most issues.
Is working with epoxy resin safe at home?
Yes, with proper precautions. Working in a well-ventilated space, wearing nitrile gloves and safety glasses, and using a respirator when sanding keeps you safe throughout the process.
The encouraging news is that most challenges beginners face have straightforward solutions once you understand the fundamentals. Instructors consistently report that students who join workshops or courses avoid the costly trial-and-error phase entirely. They learn proper ventilation setup, discover which brands work best for different effects, and gain confidence through hands-on practice with expert guidance nearby.
The crafting community has become an invaluable resource for troubleshooting. When you encounter bubbles, uneven curing, or color bleeding, fellow makers who’ve solved these exact problems share their fixes freely. This collaborative spirit means you’re never stuck figuring things out alone.
These twelve epoxy resin countertop ideas represent just the beginning of what you can create. From serene ocean waves to dramatic geode effects, each design proves that transforming your space with resin is entirely within reach, whether you’re picking up a mixing stick for the first time or you’ve already completed a few projects.
What makes this craft truly special isn’t just the stunning results you’ll achieve. It’s the journey of learning, experimenting, and discovering your own creative voice. The supportive community of resin crafters welcomes newcomers with open arms, sharing tips, celebrating successes, and helping troubleshoot challenges along the way.
You don’t need to be an expert to start. Many crafters began exactly where you are now, curious, inspired, and perhaps a bit uncertain. The difference between dreaming about a custom countertop and actually creating one often comes down to taking that first step: enrolling in a workshop, gathering your materials, or connecting with fellow enthusiasts who’ve walked this path before.
Your perfect countertop design is waiting to come to life. The skills you’ll develop, the community you’ll join, and the confidence you’ll gain make this creative journey as rewarding as the finished piece itself.